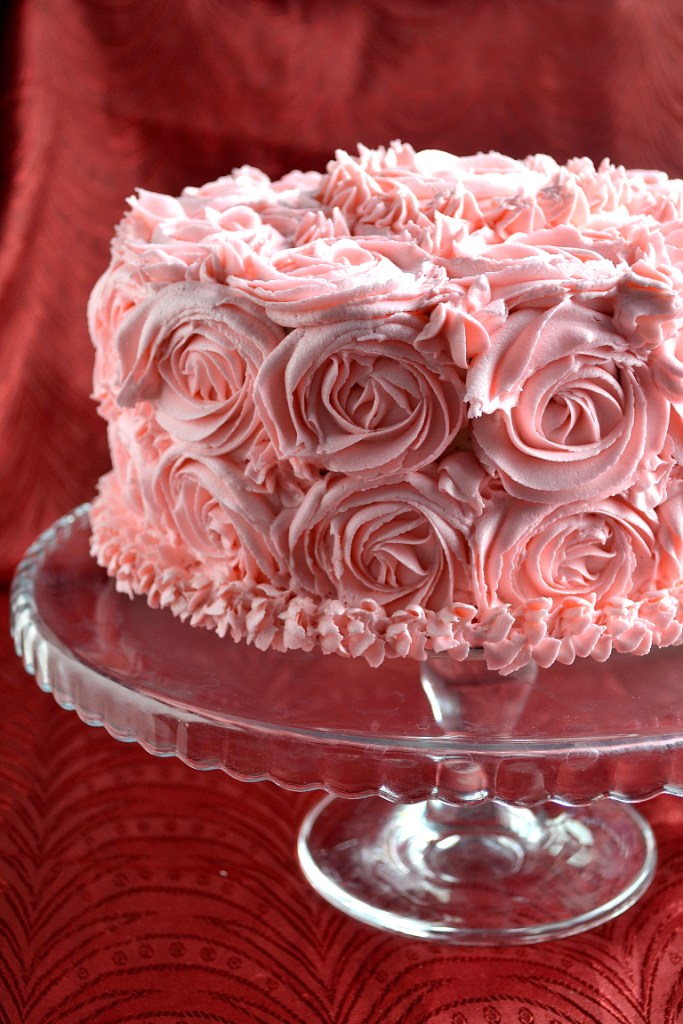
Since the day I saw rose cakes in blogs, I wanted to make it. At first I was planning to do it for Valentine's day but Sruti wanted it for her birthday. So to make daughter's wish come true I made it for her birthday. The cake was decided long before. She wanted a checker board cake so that she can get both the flavours she likes in the same cake. After going through many tutorials on the web, I was confident that i could make it for my daughter. I made the cakes the previous night and the assembling and icing part were done on the day.

After completing the decoration I shared it on FB and I got so many positive comments. Still I was not sure about how the cake will look once sliced. So keeping fingers crossed I waited for the moment. My daughter was so happy to see the finished cake and she showered me with so many kisses that I was on cloud nine. When we sliced the cake, she was literally jumping with joy. I didn't expect such a nice finish inside. I used condensed milk cake for both vanilla and chocolate flavours.
Ingredients:
For The Vanilla Sponge:
Butter-100 gm
Flour-250 gm
Condensed Milk-1 tin/ 400 gm
Baking Powder-2 tsp
Baking Soda-1 tsp
Curd-1/2 cup
Milk-1/2 cup
Vanilla Essence-1 tsp
For The Chocolate Cake:
Butter-100 gm
Flour-200 gm
Dark Cocoa Powder-50 gm
Instant Coffee Powder-1 tsp
Condensed Milk-1 tin/ 400 gm
Baking Powder-2 tsp
Baking Soda-1 tsp
Curd-1/2 cup
Milk-1/2 cup
Vanilla Essence-1 tsp
For The Butter Cream:
Butter-1 1/2 cups
Icing Sugar/ Confectioner's Sugar- 6 cups
Vanilla Essence-3 tsp
Food Colour- a few drops
Milk-3-4 tbs
Procedure:
For The Vanilla Sponge:
1. Cream together butter and condensed milk.
2. Preheat oven to 180C.
3. Mix flour, baking powder and baking soda.
4. Add vanilla essence to butter.
5. Beat in curd and milk.
6. Fold in the flour mixture.
7. Pour into grease and dusted 8" round pan.
8. Bake for 35-45 minutes.
9. Remove from oven when a tooth pick inserted comes out clean.
10. Invert the cake on a wire rack and allow it to cool completely.
For The Chocolate Sponge:
1. Cream together butter and condensed milk.
2. Preheat oven to 180C.
3. Mix flour, cocoa powder, instant coffee powder, baking powder and baking soda.
4. Add vanilla essence to butter.
5. Beat in curd and milk.
6. Fold in the flour mixture.
7. Pour into grease and dusted 8" round pan.
8. Bake for 35-45 minutes.
9. Remove from oven when a tooth pick inserted comes out clean.
10. Invert the cake on a wire rack and allow it to cool completely.
For The Butter Cream:
1. Cream butter until light.
2. Sift the icing sugar to get rid of any lumps.
3. Using an electric beater, beat butter along with sugar and essence.
4. Add sugar one cup at a time.
5. After adding all the sugar, keep on beating for 2 minutes. The more you beat, the softer and smoother the cream will be.
6. Add tablespoons of milk and beat until the butter cream comes to the required consistency.
7. Add food colour and beat until the colour is mixed uniformly.
8. Keep the bowl covered until further use.
Assembling the cake and frosting the cake:
It is better to see the pictures than explaing it.
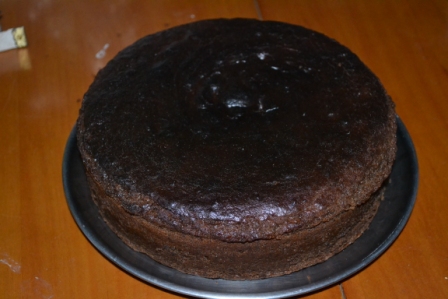
The chocolate cake.
The Vanilla Sponge.
Trim the crusts with a serrated knife.
Cut the cake exactly in the middle. I planned on making 2.5 cm squares. So as the cake was 5 cm high, I sliced it exactly into half and ended up with 2 2.5 cm high sheet cakes. Place a thread in the middle of the cake and bring the ends together.
Pull away the ends in opposite direction so that the thread slices the cake.
You will end up with two sheet cakes.
Divide the vanilla sponge also like this.
Fold a paper into 4 and draw circles measuring 2.5 cm, 5 cm, 7.5 cm and 10 cm radius with the same centre point. Cut off the 2.5 cm circle. Cut the outer circumference also.
Place the circle on the cake alligning both the outer circumferences.
Slice the inner circle.
Now cut off the next circle in the paper.
Place it on the cake and slice.
Now cut off the next circle, place on cake and slice.
You will get 4 circular cakes like this.
Apply butter cream on the inner sides. If the butter cream is not sufficient, then the pieces will fall apart once sliced.
Place alternate flavoured rings and arrange as shown.
Once the base layer is done, apply a layer of butter cream on top and make the second layer on it. Likewise finish all the four layers.
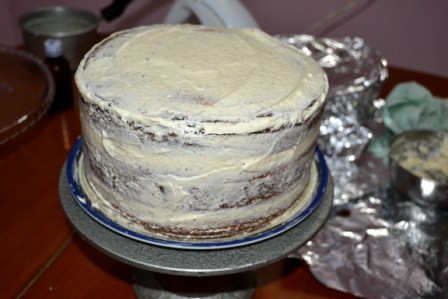
Mix the butter cream a little thin adding some milk. This is used for crumb coating the cake.
Apply a generous amount of butter cream on top and smooth it with a spatula.
Apply on the sides also. While applying on the side, fill all the gaps with butter cream and smooth the sides with a spatula.
Place a large rose tip inside a piping bag.
Place the piping bag with the tip inside a long glass.
Add butter cream.
Cover the opening by twisting it tightly.
Pipe rounds on the crumb coated cake. A rose is got by piping out 2-3 swirls starting from the centre point.
Finish piping on all the sides of the cake.
Arrange it for the birth day and wait for the birth day girl to arrive from school.
Slice it up. See the perfect squares inside. You need to do some maths before you start layering the cakes. Every thing depends on the size of the pan and the size of the square you want.
Serve and enjoy...
Labels: CAKE, DECORATION, EGGLESS, ROSE